TL;DR:
- Proper preparation and sequence are crucial for safe and effective pressure washing.
- Using the right pressure, nozzle, and detergent based on surface type prevents damage.
- Regular professional cleaning maintains property value and curb appeal, especially in humid climates.
Picture this: you pull up to your property and the driveway looks like it has been collecting every rainstorm, tire track, and fallen leaf since 2020. The siding has gone from bright white to a dull gray-green, and the front walkway is slick with algae. It is not just an eyesore. It is costing you money in lost curb appeal and, for property managers, potential rental income. The good news is that a systematic, step-by-step pressure washing process can reverse that damage quickly and safely. This guide walks you through everything: what to prepare before the first spray, how to execute each cleaning phase, how to avoid costly mistakes, and how to keep your Tampa Bay property looking sharp long after the job is done.
Table of Contents
- What to know before pressure washing
- Step-by-step pressure washing process
- Troubleshooting and avoiding common pressure washing mistakes
- Inspecting results and maintaining property cleanliness
- Our take: Why process matters more than pressure
- Get expert pressure washing help in Tampa Bay
- Frequently asked questions
Key Takeaways
| Point | Details |
|---|---|
| Proper preparation is key | Preparing the area and checking surfaces before pressure washing prevents damage and boosts results. |
| Follow the right sequence | Performing each pressure washing step in order—inspection, detergent, rinse—ensures the highest level of cleanliness. |
| Routine maintenance matters | Inspecting and maintaining property surfaces after cleaning keeps curb appeal high year-round. |
| Expert help yields best results | Professional crews in Tampa Bay offer process-driven cleaning tailored to local conditions and property types. |
What to know before pressure washing
Once you recognize the impact of grime and buildup, preparation is your first step to a successful pressure washing project. Skipping it is where most homeowners go wrong. Improper preparation can damage surfaces and landscaping, turning what should be a straightforward cleaning job into an expensive repair situation.
The first thing to do is assess your surfaces. Concrete, brick, stucco, and vinyl siding each have different tolerances for water pressure. Concrete driveways can handle higher PSI (pounds per square inch) settings. Vinyl siding and painted wood need a much gentler touch. Matching the right technique to the right surface protects your investment and produces better results. You can find more detail on choosing the right pressure washing equipment for each surface type.
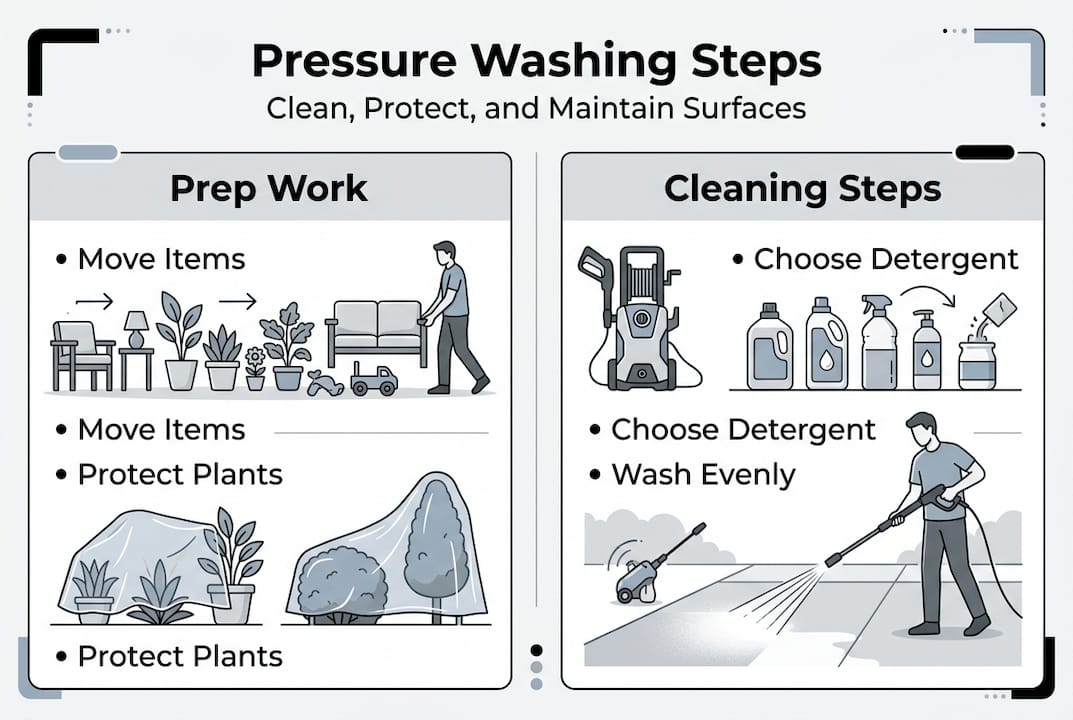
Before any water flows, move outdoor furniture, potted plants, and décor away from the work area. Cover garden beds with plastic sheeting and close all windows and doors. Secure any loose fixtures, light covers, or vents that could be dislodged by a strong stream. Following protective water runoff practices is also important in Florida, where detergent runoff can enter storm drains that flow directly into local waterways.
Weather matters too, especially in Tampa Bay. Humid, overcast days are actually better for cleaning than blazing sunshine because surfaces dry more slowly, giving detergents more dwell time to break down grime. Avoid washing right before a heavy rainstorm since rinsing your clean surfaces immediately defeats the purpose.
Tools and materials you will typically need:
- Pressure washer (gas or electric, matched to your surface needs)
- Appropriate nozzle tips (0, 15, 25, 40-degree options)
- Surface-specific cleaning detergent
- Safety goggles and non-slip boots
- Garden hose with adequate water supply
- Plastic sheeting to cover plants and fixtures
- Extension wand for reaching higher areas
For multi-story homes, rooftops, or commercial properties with high facades, calling in professionals is the smarter call. Height and water pressure together create real fall hazards that are not worth the risk. Checking out pressure washing tips for curb appeal from local experts can help you decide where the DIY line ends.
| Surface type | Recommended PSI range | Best nozzle tip |
|---|---|---|
| Concrete driveway | 2500 to 3000 PSI | 15-degree or 25-degree |
| Vinyl siding | 1200 to 1500 PSI | 25-degree or 40-degree |
| Wood decking | 500 to 800 PSI | 40-degree |
| Brick or masonry | 1500 to 2000 PSI | 25-degree |
| Roof (soft wash) | Under 500 PSI | 40-degree or dedicated soft wash |
Using eco-friendly exterior cleaning products where possible protects Florida’s sensitive ecosystem while still delivering powerful results.
“The biggest preparation mistake we see is homeowners who start washing before moving their vehicles or covering garden beds. Ten minutes of prep saves hours of damage control later.”
Pro Tip: Walk the entire perimeter of your property before touching the equipment. Note any cracked caulking, loose panels, or damaged grout that needs to be repaired before washing. Water forced into those gaps can cause serious structural damage.
Step-by-step pressure washing process
With everything set up, you’re ready to move through the actual steps of pressure washing for optimal results. Following each pressure washing step in sequence optimizes outcome and prevents property damage. Jumping ahead or reversing the order is one of the most common causes of streaking, missed spots, and surface etching.
Here is the sequence that professionals follow on every job:
- Inspect the area one final time. Look for anything you missed during prep: open vents, cracked panels, low-hanging power lines near the wash zone.
- Apply the appropriate detergent. Use a low-pressure nozzle to coat the surface evenly. Allow the detergent to dwell for five to ten minutes, but never let it dry on the surface.
- Start at the top and work downward. For building exteriors, begin at the roofline or highest accessible point. Gravity pulls dirty water down, so washing top-to-bottom prevents re-soiling cleaned areas.
- Use consistent, overlapping passes. Keep the nozzle moving at a steady pace and overlap each pass by about 30 percent. Stopping the spray in one spot for too long etches the surface.
- Rinse thoroughly from top to bottom. Switch to a wider nozzle and flush all detergent and loosened debris downward and away from landscaping.
- Detail and spot treat. After the main rinse, walk the perimeter again. Stubborn stains, corners, and edges often need a second targeted pass.
- Allow surfaces to dry completely before replacing furniture or applying any sealers.
For driveways, a surface cleaner attachment is worth every penny. It spins two nozzles in a circular pattern, eliminating the tiger-stripe lines that a single wand leaves behind. For pressure washing safety guide protocols around rooftops, always opt for soft washing, which relies on chemical cleaning at low pressure rather than raw force.
| Task | DIY approach | Professional approach |
|---|---|---|
| Detergent selection | General store-bought cleaner | Surface-specific, commercial-grade formula |
| Pressure setting | Often guessed | Measured by surface type and condition |
| Nozzle choice | One or two tips used | Full set matched to each zone |
| Coverage consistency | Variable | Even, overlapping passes |
| Rinsing | Single pass | Double-check rinse with inspection |
Reliable pressure washing services in Tampa Bay take this sequence seriously because shortcuts show up in the final results.
Pro Tip: Keep your nozzle at a consistent 12 to 18 inches from the surface. Closer means more force, which is great for concrete but destructive on siding. A quick test pass on a hidden spot before you commit to a full surface can save you from visible damage.
Choosing the right detergent matters as much as the pressure setting. Many professional-grade formulas include mildewcide, which is essential in Tampa Bay’s humid climate where mold and algae grow back fast. Following pressure washer operating tips from certified sources can help you get the most from your equipment and your detergent.
Troubleshooting and avoiding common pressure washing mistakes
Even with clear steps, there are pitfalls to be aware of that can impact safety and results. Neglecting routine maintenance or using the wrong nozzle can harm property surfaces and reduce equipment life, turning a money-saving project into a costly one.
Here are the most common mistakes and how to fix them:
- Surface etching or gouging. Usually caused by too-high PSI or holding the nozzle too close. Step back, widen your angle, and reduce pressure.
- Streaking or tiger stripes. This happens when passes do not overlap enough or when the operator moves too quickly. Slow down and overlap by at least 30 percent.
- Broken or cracked windows. Direct high-pressure spray at glass is a recipe for disaster. Always angle away from windows and use your lowest effective pressure.
- Missed spots and patchy results. Often caused by inconsistent distance or skipping the detergent dwell step. Go back and re-treat with detergent before rinsing again.
- Plant damage from detergent. If runoff reaches roots or leaves, flush with fresh water immediately. Prevention is easier: soak garden beds with plain water before you start.
- Electrical hazards. Never spray near outdoor outlets, electrical panels, or fixtures. Water and electricity are a dangerous combination that sends hundreds of people to emergency rooms each year.
“We see more damage from impatience than from equipment failure. People rush the dwell time, rush the rinse, and rush the drying step. The results speak for themselves, and not in a good way.”
For equipment care between uses, flush the pump with clean water after every job. Replace O-rings and seals annually. Store nozzles in a dry container so grit does not clog the orifices. A well-maintained machine delivers consistent pressure and extends the life of your investment. Reviewing OSHA safety recommendations for pressure washing gives you a clear picture of the hazards that professionals are trained to manage.
Higher windows and gutters deserve special mention. At heights above eight feet, the combination of a high-pressure recoil and a wet ladder is genuinely dangerous. This is a situation where deep cleaning steps handled by trained crews with proper safety gear make far more sense than a DIY attempt.
Pro Tip: After finishing a session, fire up the pressure washer briefly with just clean water to flush residual detergent through the pump and hose. This single habit significantly extends the machine’s working life and keeps nozzles clear for next time.
Inspecting results and maintaining property cleanliness
Once cleaning is done, verifying your success and planning for upkeep are essential to keep your property looking its best. Routine inspection after pressure washing ensures long-term curb appeal and prevents recurring issues that sneak up on you between professional visits.
A good post-wash inspection covers these points:
- Visual cleanliness from multiple angles. Walk the property in morning light, which reveals shadows and streaks that afternoon sun hides.
- Touch test on key surfaces. A clean concrete driveway should feel rough and grippy, not slick or coated with residue.
- Check for remaining stains. Oil spots, rust, and heavy organic staining sometimes need a second targeted treatment with a specialized product.
- Look for any signs of damage. Inspect caulking lines, panel edges, and grout joints for any areas where water may have forced its way in.
- Smell test for mold. If a surface smells musty even after washing, the mold may have penetrated deeper and needs a dedicated anti-fungal treatment.
For ongoing maintenance, sweeping driveways and walkways weekly removes debris before it bonds to the surface. Rinsing exterior walls after heavy rain washes away fresh pollen and dust before it can set. Trimming overhanging tree branches reduces leaf and organic debris accumulation that feeds algae growth.
Understanding the importance of regular pressure washing in Tampa Bay’s humid climate is key. Mold, mildew, and algae grow far faster here than in drier climates. Skipping even one annual cleaning cycle can allow biological growth to stain and weaken surfaces.
Reviewing pressure washer maintenance tips from trusted sources also helps you keep your own equipment in peak condition between professional service visits.
| Exterior area | Recommended rewash frequency |
|---|---|
| Concrete driveway | Every 12 months |
| Vinyl or stucco siding | Every 12 to 18 months |
| Wood decking | Every 12 months |
| Roof (soft wash) | Every 18 to 24 months |
| Sidewalks and walkways | Every 12 months |
| Commercial storefronts | Every 6 months |
Setting a calendar reminder at the start of each year makes scheduling easy and keeps your property from backsliding into that dull, grimy look that damages curb appeal and, ultimately, property value.
Our take: Why process matters more than pressure
After learning the step-by-step strategies, it is worth considering why a proper process makes all the difference. Here is an honest truth that the pressure washing industry rarely advertises: the machine doing the work matters far less than the person operating it and the sequence they follow.
We regularly talk to homeowners who rented the biggest, most powerful pressure washer available and still ended up with streaky driveways, damaged siding, and frustrated neighbors. Then there are professionals using mid-range equipment who produce flawless results every time. The difference is process. Consistency. Knowing which nozzle to use at what distance, when to let detergent dwell, and when to back off the pressure entirely.
The myth of the “quick blast” is one of the most damaging ideas in home maintenance. People assume that more pressure equals more clean. In reality, ultra-high pressure on the wrong surface strips paint, etches concrete, and forces water behind panels where it causes rot and mold for years afterward. The damage is not always visible immediately, which makes it worse.
Tampa Bay properties face unique challenges: humidity, salt air, intense UV exposure, and biological growth that returns faster than in most of the country. That environment demands a process-driven approach from people who understand local conditions. The advanced curb appeal strategies that work here are built around that understanding, not just raw equipment power.
Consistency and planning yield the highest returns. A property washed well every year holds its appearance and value far better than one blasted randomly at maximum pressure every few years.
Get expert pressure washing help in Tampa Bay
Ready to see the difference? Connect with professionals who follow these proven steps. Everything covered in this guide, from surface assessment to post-wash inspection, is what experienced crews in Tampa Bay put into practice on every job.

Our pressure washing pros understand this region’s climate, surfaces, and the specific challenges that Florida humidity and organic growth create. Whether you need full exterior pressure washing for your home or a full property refresh for a commercial space, we match the right equipment and technique to every surface. Residential, commercial, and property management clients all find flexible scheduling and clear, upfront pricing when they reach out. Explore our complete cleaning solutions or contact us directly to get a free estimate and see what a process-driven cleaning can do for your property’s curb appeal and value.
Frequently asked questions
How often should properties in Tampa Bay be pressure washed?
Most Tampa Bay properties benefit from professional pressure washing once a year, but homes near trees or busy roads may need cleaning more frequently. Annual pressure washing helps maintain property value and curb appeal across all exterior surfaces.
What surfaces can be safely pressure washed?
Concrete, brick, vinyl siding, and some decking materials are commonly cleaned, but fragile surfaces like painted wood or old masonry need a gentler approach. Different materials require unique washing techniques to avoid etching or stripping finishes.
Is pressure washing safe for plants and landscaping?
With correct preparation and eco-friendly practices, pressure washing can be safe for landscaping, but plants should be covered and detergent kept away from roots. Improper preparation can damage landscaping, so soaking garden beds with plain water before washing provides an important buffer.
What’s the difference between pressure washing and power washing?
Pressure washing uses cold or room-temperature water under pressure; power washing uses heated water, which is more effective against heavy grease or mildew. Pressure washing and power washing differ primarily by water temperature and the types of stains they tackle best.
How can I tell if my property needs professional pressure washing?
If dirt, mold, or stains return quickly after cleaning or surfaces look dull despite effort, it is time to call in experts with specialized knowledge and equipment. Professionals handle stubborn stains and prevent damage that DIY approaches often make worse.